

The TRUNCATE TABLE statement is a simple statement that has a very singular purpose in Microsoft SQL Server.
In this very brief tutorial, we’ll cover all the important information you need to know about the TRUNCATE TABLE statement. We’ll cover these topics:
- What is the SQL Server TRUNCATE TABLE statement?
- The syntax for the TRUNCATE TABLE statement
- The benefit of running TRUNCATE TABLE versus DELETE
- Tips, tricks, and links
Let’s get into it.
1. What is the SQL Server TRUNCATE TABLE statement?
The TRUNCATE TABLE statement will delete all rows from a table. It is ideal when you want to clear the content of a table in an efficient way.
When you run the TRUNCATE TABLE statement against a table, it will very simply delete all rows from the table. It does not support a WHERE clause to allow you to delete only a subset of rows from a table.
You could also run a DELETE statement without a WHERE clause if you wanted to delete all rows from a table, but we’ll learn why you might not want to do that and instead choose to use the TRUNCATE TABLE statement.
2. The syntax for the TRUNCATE TABLE statement
The syntax is extremely simple:
TRUNCATE TABLE <table_name>
All you do is outline the table name for which you want to delete all rows. For example, if we wanted to delete all content from a table called Employees, we would run this code:
TRUNCATE TABLE Employees
3. The benefit of running TRUNCATE TABLE versus DELETE
The question is “Why should I choose to use TRUNCATE TABLE instead of DELETE if I want to delete all rows from a table?“.
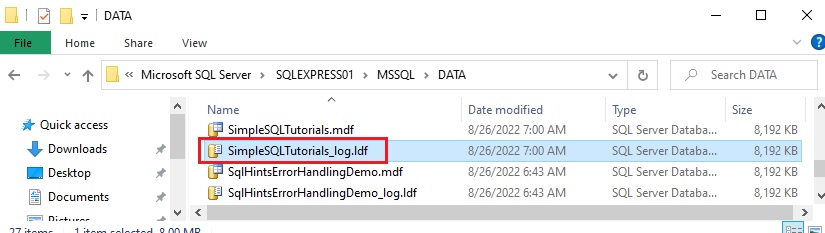
Understand that the TRUNCATE TABLE statement is minimally logged. SQL Server maintains something called a log file for each database. That log file has a .LDF extension and can be found deep in the folder structure for your SQL Server. Here is the location of my .LDF file for my database SimpleSQLTutorials:
Any time a data manipulation statement is ran (i.e. INSERT, UPDATE, DELETE, TRUNCATE), an entry is written into this log file. This log file exists for data recovery purposes. If data is somehow lost or becomes corrupted, we can basically use this .LDF file to see what statements have been executed and use those to recover the data to a state before the data was lost or corrupted. That would be an exercise for a database administrator.
The TRUNCATE TABLE statement is still logged, but much less than any of the other DML statements. It’s really only logged enough to allow a ROLLBACK to work correctly if you happen to run your TRUNCATE TABLE statement within a transaction.
Minimal logging makes TRUNCATE TABLE faster than DELETE
This minimal logging makes the process much faster. Since SQL Server isn’t trying to log every tiny detail about the action, the process is much faster than, say, a DELETE statement without a WHERE clause. If we’re trying to clear the content of a table with millions of rows, for example, TRUNCATE TABLE would likely take only a few seconds. A DELETE statement, on the other hand, might take several seconds, maybe even a few minutes to complete.
So again, if your goal is to clear all content of a table, and you don’t care about logging, you should choose to use TRUNCATE TABLE.
4. Tips, tricks, and links
Here is a list of a few tips and tricks you should know about the SQL Server TRUNCATE TABLE statement:
Tip # 1: You cannot run a TRUNCATE TABLE statement against a table that is referenced by a foreign key constraint
One weird factoid about TRUNCATE TABLE is how you cannot run it against a table being used as the referenced table in a foreign key constraint.
Let’s create two tables to demonstrate. We’ll start with an Actors table:
CREATE TABLE Actors
(
ActorID INT PRIMARY KEY IDENTITY(10,10),
FirstName VARCHAR(30),
LastName VARCHAR(30)
)
Then a Movies table:
CREATE TABLE Movies
(
MovieID INT IDENTITY(1,1),
Title VARCHAR(50),
LeadActorID INT
)
Notice the LeadActorID column in the Movies table. This is meant to be a foreign link back to the Actors table. We’ll go ahead and create an actual foreign key constraint for this column:
ALTER TABLE Movies ADD CONSTRAINT fk_ActorID FOREIGN KEY (LeadActorID) REFERENCES Actors(ActorID)
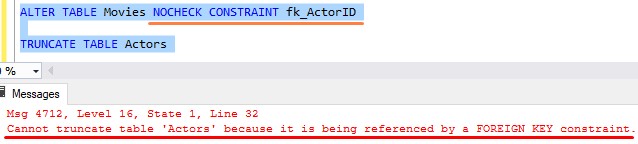
It’s important to understand which table is the referenced table and which is the referencing table. The referenced table (a.k.a the parent table) is the Actors table. The referencing table (a.k.a the child table) is the Movies table. So again, since the Actors table is the referenced table in a foreign key constraint, we cannot run a TRUNCATE TABLE statement against it:

We get the message “Cannot truncate table ‘Actors’ because it is being referenced by a FOREIGN KEY constraint.”
Notice this is true even if the table is empty!
Even if we disable the foreign key constraint, we still won’t be able to run a TRUNCATE TABLE statement against Actors:
So if you absolutely need to run a TRUNCATE TABLE statement against your table, you need to basically drop the foreign key constraint, then run the TRUNCATE TABLE statement, then re-create the constraint.
Learn how in the full tutorial: SQL Server Foreign Key: Everything you need to know
Tip # 2: The TRUNCATE TABLE statement will reseed the IDENTITY property
To demonstrate this next tip, let’s drop the foreign key constraint in the Movies table:
ALTER TABLE Movies DROP CONSTRAINT fk_ActorID
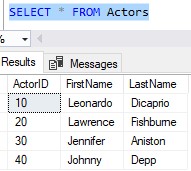
When we created the Actors table, we established the IDENTITY property on the ActorID column with a seed value of 10 and a step value of 10. We’ll add a few rows to the table:
INSERT INTO Actors (FirstName, LastName)
VALUES
('Leonardo','Dicaprio'),
('Lawrence','Fishburne'),
('Jennifer','Aniston'),
('Johnny','Depp')
Here’s what the table should look like:
If we run a TRUNCATE TABLE statement against this table (which we can do now because the foreign key constraint has been dropped), the IDENTITY property will be reseeded to it’s original seed value, which in this case is 10. Let’s run a TRUNCATE TABLE statement on the Actors table:

Then we’ll insert just one row. We see this new row is given an ActorID of 10:
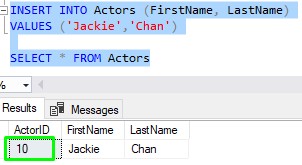
Yep, the IDENTITY property was reset to the original seed value! Very cool.
Links:
You should consider getting the book T-SQL Fundamentals by Itzik Ben-Gan. It goes over several core concepts you should know about Microsoft SQL Server, including a full discussion on the SQL Server TRUNCATE TABLE statement. This book helped me out tremendously when I was first starting out with SQL Server, and I reference it all the time now. You won’t regret owning this book, trust me. Get it today!

Next Steps:
Leave a comment if you found this tutorial helpful!
Do you know these 6 rules about SQL Server Transactions? Click the link to find out!
Thank you very much for reading!
Make sure you subscribe to my newsletter to receive special offers and notifications anytime a new tutorial is released!
If you have any questions, please leave a comment. Or better yet, send me an email!